
Looking for a fun craft idea for kids of all ages? These DIY Painted Flower Pots are perfect! I recently made these cute acrylic painted pots with campers at our local church camp and they were a big hit!

Today I’m sharing my step by step tutorial on how to paint terracotta pots with acrylic, how to make them weather proof, as well as some fun painting ideas.
** Disclaimer: As an Etsy associate and as an Amazon.com Associate, I may earn from qualifying purchases made by readers clicking my affiliate links at no extra cost to you.
Supplies Needed for Painted Flower Pots
For these adorable painted flower pots you will need the following items.
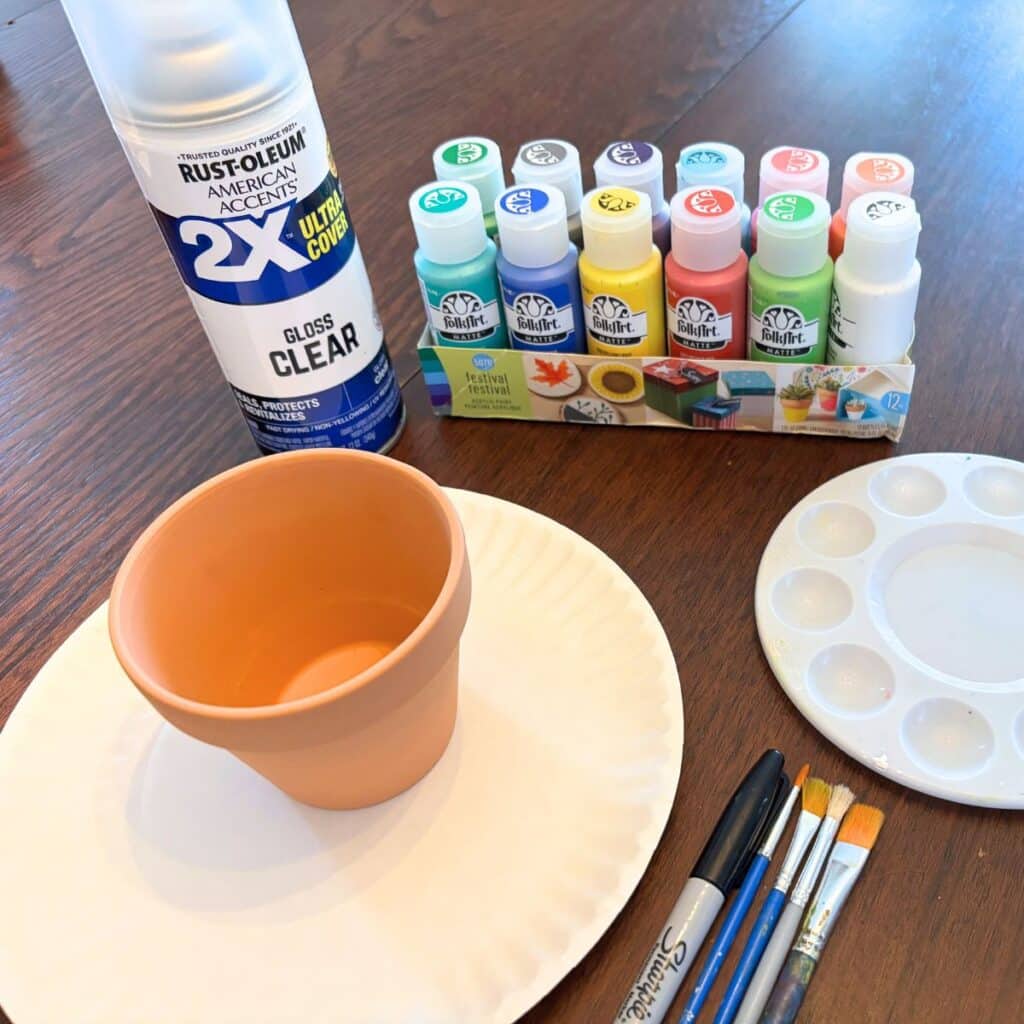
- Terra cotta Pots (I recommend 4 inch pots or 6 to 7 inch clay pots)
- Acrylic Paints – a variety of bright colors as well as white and black acrylic craft paint are nice to have
- Paint Brushes of varying sizes
- Paint Palettes – these make the project a little less messy and we waste less paint
- Water Cups – you can use anything from empty plastic containers to coffee mugs
- Sharpie Permanent Marker- to write their name on the pot
- Table Cloth – to keep your workspace clean
- Paper Plates – to make turning the pot while painting easier
- Rust-oleum 2x Ultra Cover Gloss Clear – this spray paint will make the pots weatherproof
- Optional: paint pens, foam brushes, napkins or a damp cloth for messes.

Painting Flower Pots with Acrylic
First, prepare your workspace. We like to lay down a plastic tablecloth before working. If you are painting outside like I was with campers, you can use painter’s tape to attach the table cloth to the table.
Next lay out all of your acrylic paint bottles, paint palettes, and a variety of paint brushes. Kids will likely want larger brushes for painting large areas and tiny tipped brushes for fine details.
Place water cups near groups of painters so that they can rinse their brushes out when they switch colors.

Provide each child with a terra cotta pot and have them use a sharpie to write their name on the bottom of the pot. Then place it on top of a paper plate. This will help them keep the tablecloth clean while also making it easier to turn the pot while they are painting.
Have each child take a paint palette and choose some paint colors. Remind the kids that they won’t likely need as much paint as they think. A little goes a long way.
Once they have their supplies, it’s time to paint. Some kids will know right away what they want to create while others might need some inspiration.
I printed off pictures of painted pots from Pinterest to show the kids some interesting ideas like painting tiny cherries, making a watermelon pot, an ice cream cone, large flowers, and tiny floral designs.

Remind kids that they might like to paint a background color and then wait for it to dry before adding more details. Some colors, like white, will need a base coat followed by a second coat of paint to thoroughly cover the terra-cotta pots.
We did our flower pot painting in 2 art sessions (about 45 minutes each day).
Pro tip: Make sure to stop painting 5 to 10 minutes before the end of each session to have a little time for each child clean their paint brush and palette!

Once they have finished painting their design, allow it plenty of time to dry. I waited a full 24 hours, but you could likely wait just a few hours for the pots to dry.
After they are dry, spray each pot with Rust-oleum 2x Ultra Cover Gloss Clear. This will make the pots weather-proof and give them a shiny finish. An adult should do this part in a well-ventilated area.
And….that’s it!
These painted terracotta pots make wonderful handmade gifts for Mother’s Day or Father’s Day. And of course, my campers had a lot of fun making their own garden pot.

Some of them planned to give it away while others planned to use theirs as plant pots. These painted terracotta flower pot crafts also work well as pencil holders or organizational jars.
I loved that this easy DIY project was engaging and fun for teenagers as well as younger kids as well!
Flower Pot Painting Ideas
Here’s just a few of the many amazing ideas my campers had for painting flower pots with acrylic!

One camper created this pretty tree shadow scene on a blue night time background. The pink pot has an adorable cherry print!

This chicken flower pot is super cute and yet so simple too!

I love this earthy colored pot with simple designs and patterns.

One child took the watermelon themed pot idea and made it her own with heart seeds. Another camper used earthy colors to create a vine and leaves on her clay pot.

Isn’t this ice cream design adorable! So easy too!

This tree pattern was another flower pot that stood out amongst the rest!

Another view of the tree clay pot in progress. Plus an adorable tiny flower print!

This galaxy themed pot was another amazing idea.
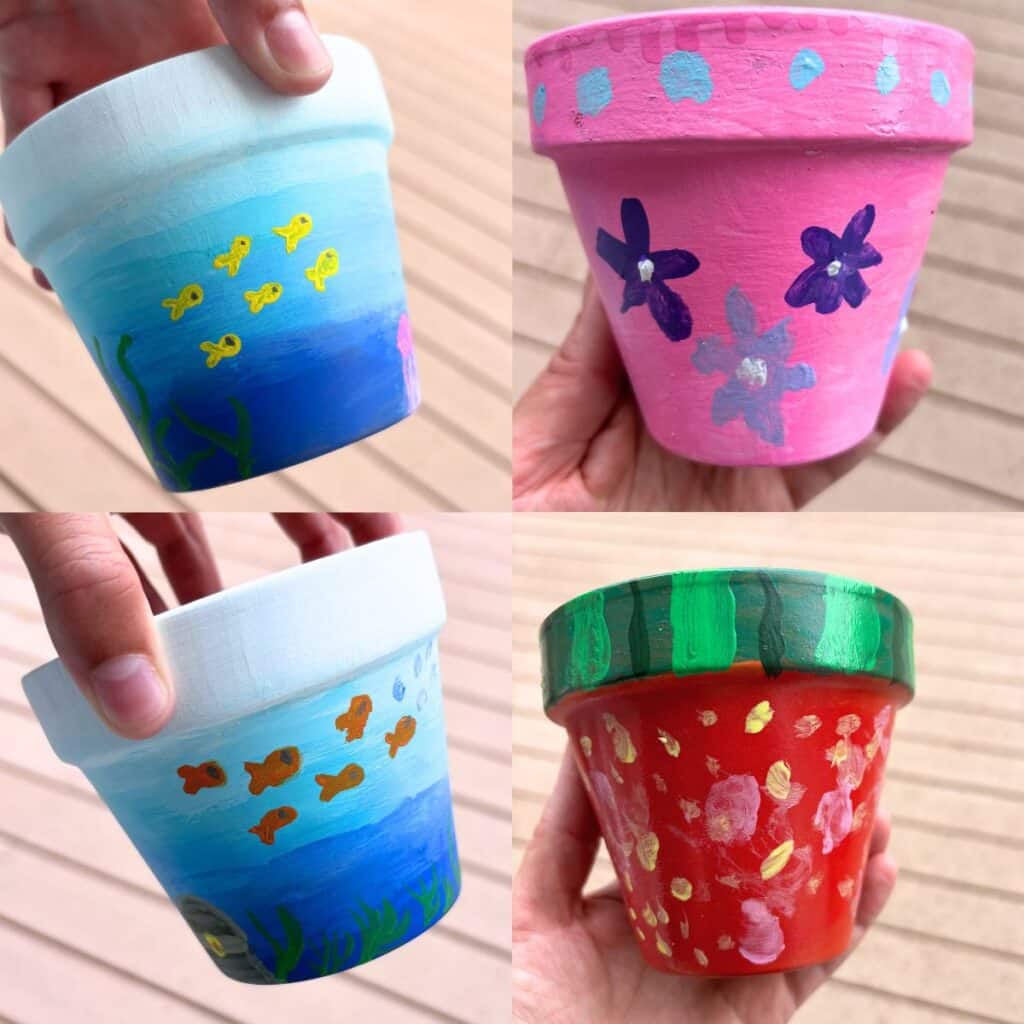
Isn’t this ombre effect so pretty! She added fish and ocean details! One little girl made a strawberry pot while another did a pretty floral print.
More Easy Camp Crafts
Looking for more fun ideas for kids and teens?
These Painted Rocks are so much fun! Learn about the best paint and sealant to use to get the best results.
This DIY Bottle Cap Keychain is another good choice for camp crafts. Get the step-by-step tutorial here.
And of course Tie-Dye is always a fun idea! All you need is a few simple supplies from your local craft store! We like to do tie-dye the easy way with this One Step Tie Dye kit.
If you are working with younger kids, be sure to check out these Pipe Cleaner Crafts for kids. Tons of fun ideas!
Want to save this tutorial for painting outdoor pots with acrylic? Pin the image below to your DIY Crafts for Kids board on Pinterest.
